Use one of the following alerts to receive email notifications on a regular cadence or when Edgio detects an unusual traffic pattern:
Real-Time Alerts: Receive notifications when unusual traffic patterns are detected and resolved. Use these notifications to investigate and remediate abnormal traffic patterns as they occur.
Daily or Weekly Alerts: Receive notifications for performance-related statistics and events that typically do not require immediate attention.
Receive email notifications when the condition(s) defined for a specific environment are met. For example, you can receive a notification when the number of 404 Not Found responses exceeds 10 per second or when your bandwidth is less than 100 Megabits per second.
A condition consists of the following components:
Metric: Determines the type of condition that will be monitored. Choose between:
Status Code Frequency: Tracks the number of times that a specific status code or class of status codes (e.g., 4xx or 5xx) occurs per second.
Status Code Ratio: Tracks a specific status code or class of status codes as a percentage of total traffic.
Bandwidth: Tracks the amount of traffic flowing through our network.
Operator: Establishes the relationship between the metric and the value assigned to it.
<: Less than. This condition is satisfied when the metric’s current value is less than the threshold value.
>: Greater than. This condition is satisfied when the metric’s current value is greater than the threshold value.
<=: Less then or equal to. This condition is satisfied when the metric’s current value is less than or equal to the threshold value.
>=: Greater than or equal to. This condition is satisfied when the metric’s current value is greater than or equal to the threshold value.
Threshold: Define the threshold for the selected metric.
Duration: Defines the length of time that one or more condition(s) associated with this real-time alert must be satisfied before a notification may be sent.
For example, if you set a 1 minute duration for status code frequency, then the rate for that status code must match or exceed the specified value for an entire minute before a notification is sent.
You may create multiple alerts per environment and each alert may contain multiple conditions. A notification will not be triggered until all of its conditions have been satisfied.
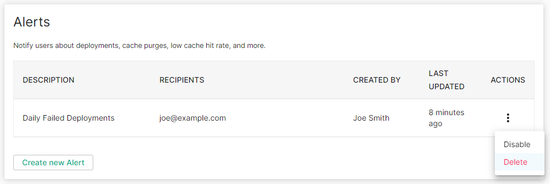
You may create, modify, and delete real-time alerts.
To create a real-time alert
Navigate to the desired environment’s Realtime Alerts page.
From the Edgio Console, select the desired private space or organization.
Select the desired property.
From the left-hand pane, select the desired environment from under the Environments section.
From the left-hand pane, select Realtime Alerts.
Click + New Alert.
In the Alert Name option, assign a name to this configuration.
The subject line for each email notification identifies the real-time alert that was triggered or resolved by name. As a result, we recommend that you define a name that identifies the type of alert and the organization, property, and environment to which it applies. This naming convention provides you with immediate context when an alert is triggered.
Example:5xx Alerts for My Organization - My Property - Production
From the Duration option, select the amount of time that the condition(s) associated with this real-time alert must be met before a notification may be sent.
Add one or more condition(s) that must be satisfied before a notification is sent.
Click + Add.
Select the desired metric.
If you selected a status code metric, then set the Status code option to the desired status code or status code class (e.g., 4xx).
From the Operator option, select the mathematical operator that establishes the relationship between the selected metric and a threshold value.
Specify the threshold value that must be met.
Status Code Frequency: Set the Frequency (per sec) option to a threshold value for the number of responses that result in the specified status code or status class per second.
Status Code Ratio: This metric monitors status code responses as a percentage of total traffic. Set the Ratio (%) option to the desired threshold percentage.
Bandwidth: Set the Amount option to a threshold value for the desired bandwidth and then set the Unit option to the desired units for the specified threshold.
Optional. Add another condition that must also be satisfied before a notification is triggered by repeating steps i - v.
In the Emails option, type an email address to which notifications will be sent and then press ENTER. Repeat this step as needed.
Click Create.
To modify a real-time alert
Navigate to the desired environment’s Realtime Alerts page.
From the Edgio Console, select the desired private space or organization.
Select the desired property.
From the left-hand pane, select the desired environment from under the Environments section.
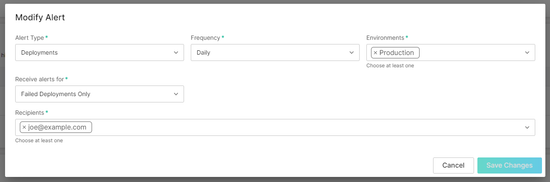
Receive daily or weekly notifications for the following type of events:
All or failed deployments for one or more environment(s).
Core web vitals for one or more domain(s).
Cache hit ratio for one or more environment(s). You may restrict this notification to only report when the cache hit ratio falls below a specific threshold.