Features customize how Edgio processes your traffic. Common customizations are listed below.
- Disabling caching.
- Defining a custom caching policy.
- Defining a custom cache key.
- Adding cache metadata to the response.
- Sending a custom response for a specific status code.
- Tagging requests for purging.
- Redirecting HTTP requests to HTTPS.
Disable Caching
By default, Edgio will only cache content when it receives cache directives from your origin (e.g., your web servers). Prevent Edgio from caching content even when cache directives are present by disabling caching for the desired requests through the Bypass Cache feature.

Add the Bypass Client Cache feature to instruct the client that it should not cache the response.

Custom Cache Policy
Customize how long Edgio will cache your content on our network by adding the Set Max Age feature. Define a max-age interval for each desired status code.
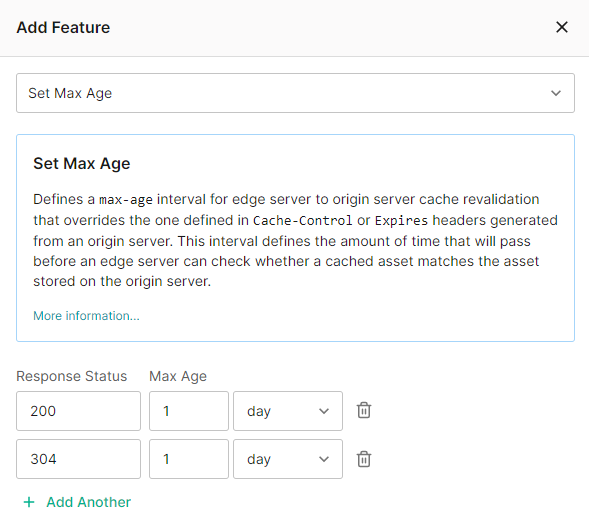
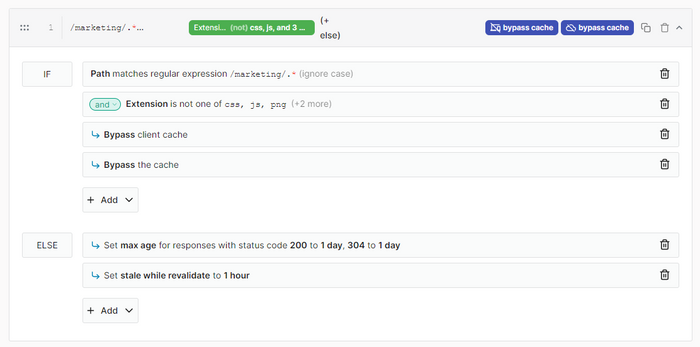
Add the Stale While Revalidate feature to allow Edgio to serve a cached response during cache revalidation. In the following illustration, both of these features have been added within an ELSE statement. This means that these features are applied when a request does not satisfy the match conditions in the IF statement. In this case, it means that these features are only applied when either of the following conditions are true:
- The request’s relative path does not start with the
/marketingdirectory. - The request’s file extension matches one defined within the Extension match condition.
Custom Cache Key
Edgio uses a cache key to look up whether the requested content has been previously cached. By default, this cache key is determined by a variety of factors, including the requested URL and query string. This default configuration can lead to an optimal cache hit ratio when Edgio serves different content for each unique query string. However, the cache hit ratio may be suboptimal when any of the following conditions are true:
- The response body does not vary by query string.
- The response body varies according to a subset of query string parameters.
- The response body varies according to another factor (e.g., request header or device type).
Use the Cache Key feature to tailor the cache key according to how unique responses are generated. For example, you can exclude the query string from the cache key or only include specific query string parameters. You may also add headers, cookies, and feature variables to the cache key. The following sample configuration includes the
category and country query string parameters and the device header within the query string: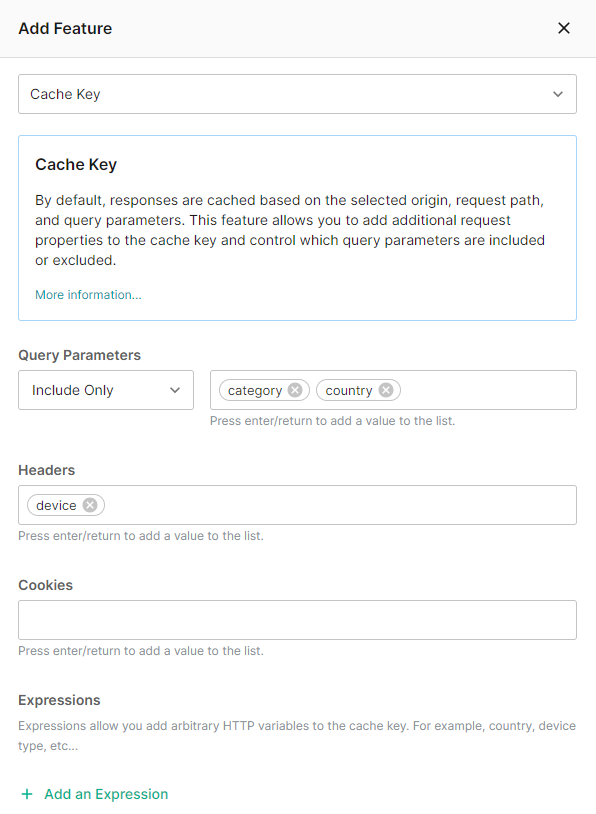
Cache Metadata
Troubleshoot cache-related issues by including cache metadata within the response sent to the client. This requires enabling the Debug Header feature. We recommend that you enable it within a rule that applies to all requests as illustrated below.
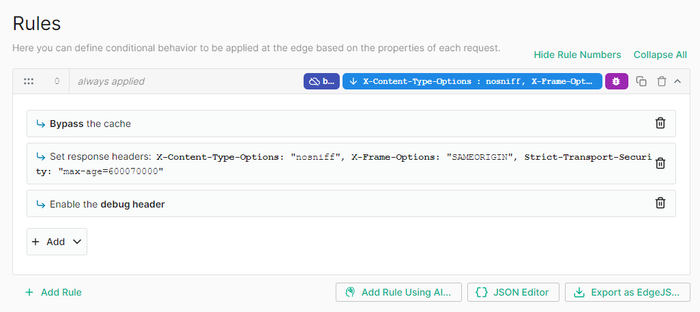
Once you have enabled this feature, cache metadata will be included in the response when you use the Edgio Developer Tools Chrome extension or by manually requesting it through headers.
Custom Response for Specific Status Codes
A common task is to provide a custom response for a specific status code.
-
Add a Response Status Code match condition and set it to the desired status code(s). For example, match on common
4xxstatus codes by selecting theis one ofoperator and then adding400,403, and404to the Value(s) option.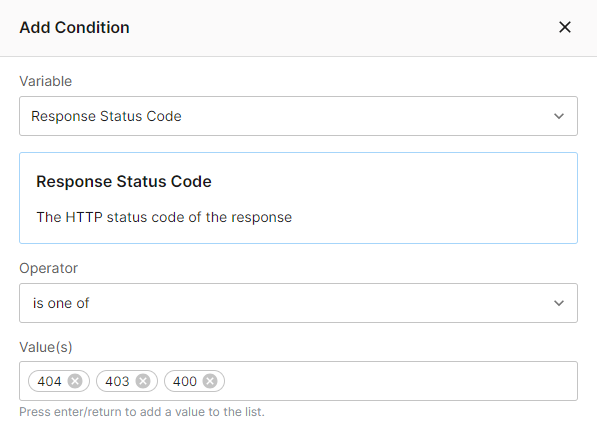
-
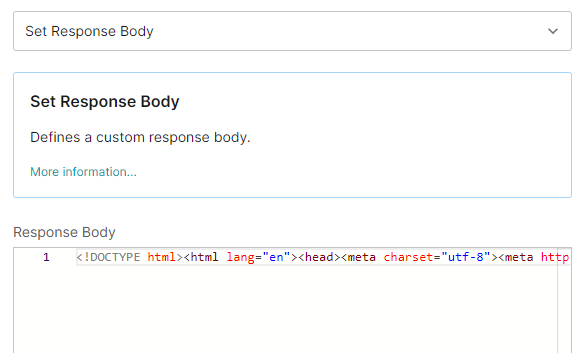
Define a custom response by setting the Set Response Body feature to the desired content.
-
Enable the Set Done feature to prevent cache misses from being forwarded to your origin. Your rule should now look similar to this illustration:

Alternatively, you can instruct the client to redirect to a different URL, such as a dedicated page for
4xx responses.- Add a Response Status Code match condition as indicated above.
- Add the Set Status Code feature and set it to return the
302status code. - Add the Set Response Headers feature and set the
Locationheader to the URL to which the client will be redirected.
Your rule should now look similar to the following illustration:

Tagging Requests for Purging
Tag requests for purging by setting the
Surrogate-Key response header to the desired labels. If you use the Set Response Headers feature to set this header, then you can take advantage of feature variables when defining labels. This allows you to dynamically assign one or more label(s).Tagging by Hostname
Tag requests by hostname by setting the
Surrogate-Key response header to: %{host}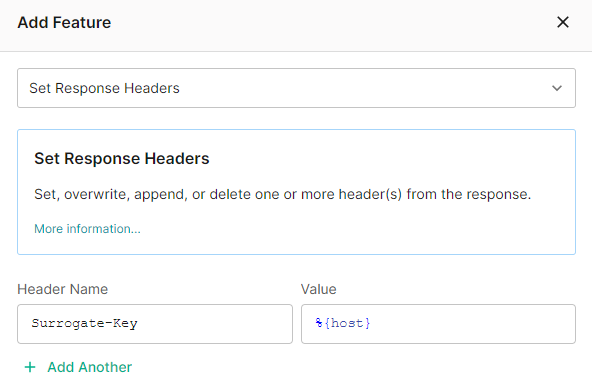
After which, you may purge requests by hostname as shown below.

The above purge request will purge all requests that were tagged with either
cdn.example.com or www.example.com.Tagging by Country and File Extension
Tag requests by country and file extension by setting the
Surrogate-Key response header to this value:%{geo_country} %{path//.*\./}Both values are feature variables. The first value (i.e.,
%{geo_country}) identifies the country (e.g., US, MX, or FR) from which the request originated. The second value (i.e., %{path//.*\./}) performs a find and replace on the %{path} feature variable. This pattern replaces the request’s relative path with the file extension without the period (e.g., htm, css, and png). A sample configuration is shown below.
Purge requests by country of origin, file extension, or both as shown below.

The above purge request will purge all requests that were tagged with
US, png, or both values.Single Tag with Multiple Conditions Example
An alternative approach is to combine multiple conditions within a single tag. For example, tag content using a single tag that combines country and file extension by setting the
Surrogate-Key response header to the following value:%{geo_country}-%{path//.*\./}Purge all requests that originate from within the US for PNG images by submitting the following surrogate key purge:
US-pngHTTP to HTTPS Redirects
Automatically redirect all HTTP requests to HTTPS.
-
Identify all HTTP requests by adding the Scheme match condition and setting it to
HTTP. -
Redirect HTTP requests to a HTTPS URL through the URL Redirect feature.
- Set the Source option to
(.*). - Set the Destination option to
https://%{host}$1. The%{host}is a feature variable that is replaced by the host defined in the request URL. The$1represents the relative path for the request submitted by the client.

- Set the Source option to
Your rule should now look like similar to this:

Default Image Optimizations
Automatically apply one or more image optimizations to all images. Once you have applied the following configuration, Edgio will apply:
- Your default optimizations to all images.
- Any additional optimizations defined within the request, as long as those optimizations do not conflict with your default optimizations.
-
Identify all images by adding the Path match condition. Use the
matches (simple)operator and set the Match Value option to:/:path*/:file.:ext(jpg|jpeg|png|gif)The above value matches all requests whose file extension is either jpg, jpeg, png, or gif.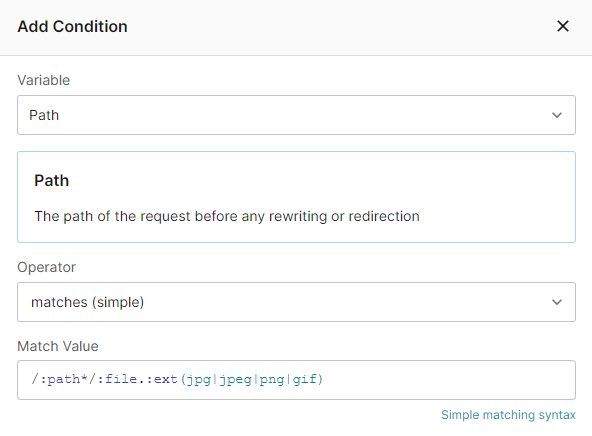
-
Enable Image Optimization by adding the Optimize Images feature.
-
Improve cache efficiency by adding the Cache Key feature. Set the Query Parameters option to
Exclude All. -
Apply a default set of image optimizations by rewriting the URL through the Rewrite URL feature. Configure it as directed below.
-
Set the Source Path (Optional) option to:
/.+ -
Set the Match Style option to
regexp. -
Set the Destination Path option to:
%{path}?%{query_string/(.+)/$1&}$1&<Default Optimizations>Example:For example, the following configuration automatically generates a WebP image and strips metadata from the image:%{path}?%{query_string/(.+)/$1&}$1&auto=webp&strip=1Your rule should now look like similar to this: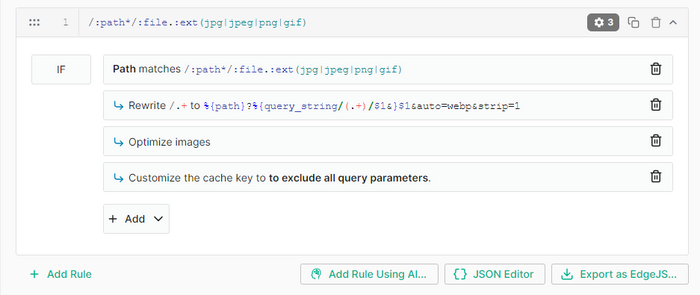
-