This tutorial demonstrates how to split traffic between our simple and full-featured sample sites.
Quick Start
- Create an entry environment that contains origin configurations through which traffic will be routed between our sample sites.
- Create an origin configuration that points to our simple performance site.
- Create an origin configuration that points to our full-featured performance site.
- Create a rule that sets the
x-edg-experimentscookie and another one that returns the Experimentation - Variant Selector web page. - Create an experiment that splits traffic between the entry environment’s origin configurations.
Although our sample traffic splitting implementation allows you to seamlessly switch between variants, your implementation will require you to reload the sample site after selecting a new variant.
Why? Our website’s security denies page reload requests from a different origin.
Create Entry Environment
This tutorial requires an environment that is dedicated to splitting traffic between our sample sites. We will now add one by creating a property.
-
Load the desired organization or your private space.
-
Click New Property.
-
Under the Self Host Property section, click Create Property.
-
In the Property Name option, type
Basic Traffic Splitting. -
Set up an origin configuration for the Simple Performance site.
- From the Origins section, set the Name option to
simple-site. - Set the Origin Hostname option to
edgio-community-examples-v7-simple-performance-live.edgio.link. - Set the Override Host Header option to
edgio-community-examples-v7-simple-performance-live.edgio.link.
Your new property configuration should now look like this: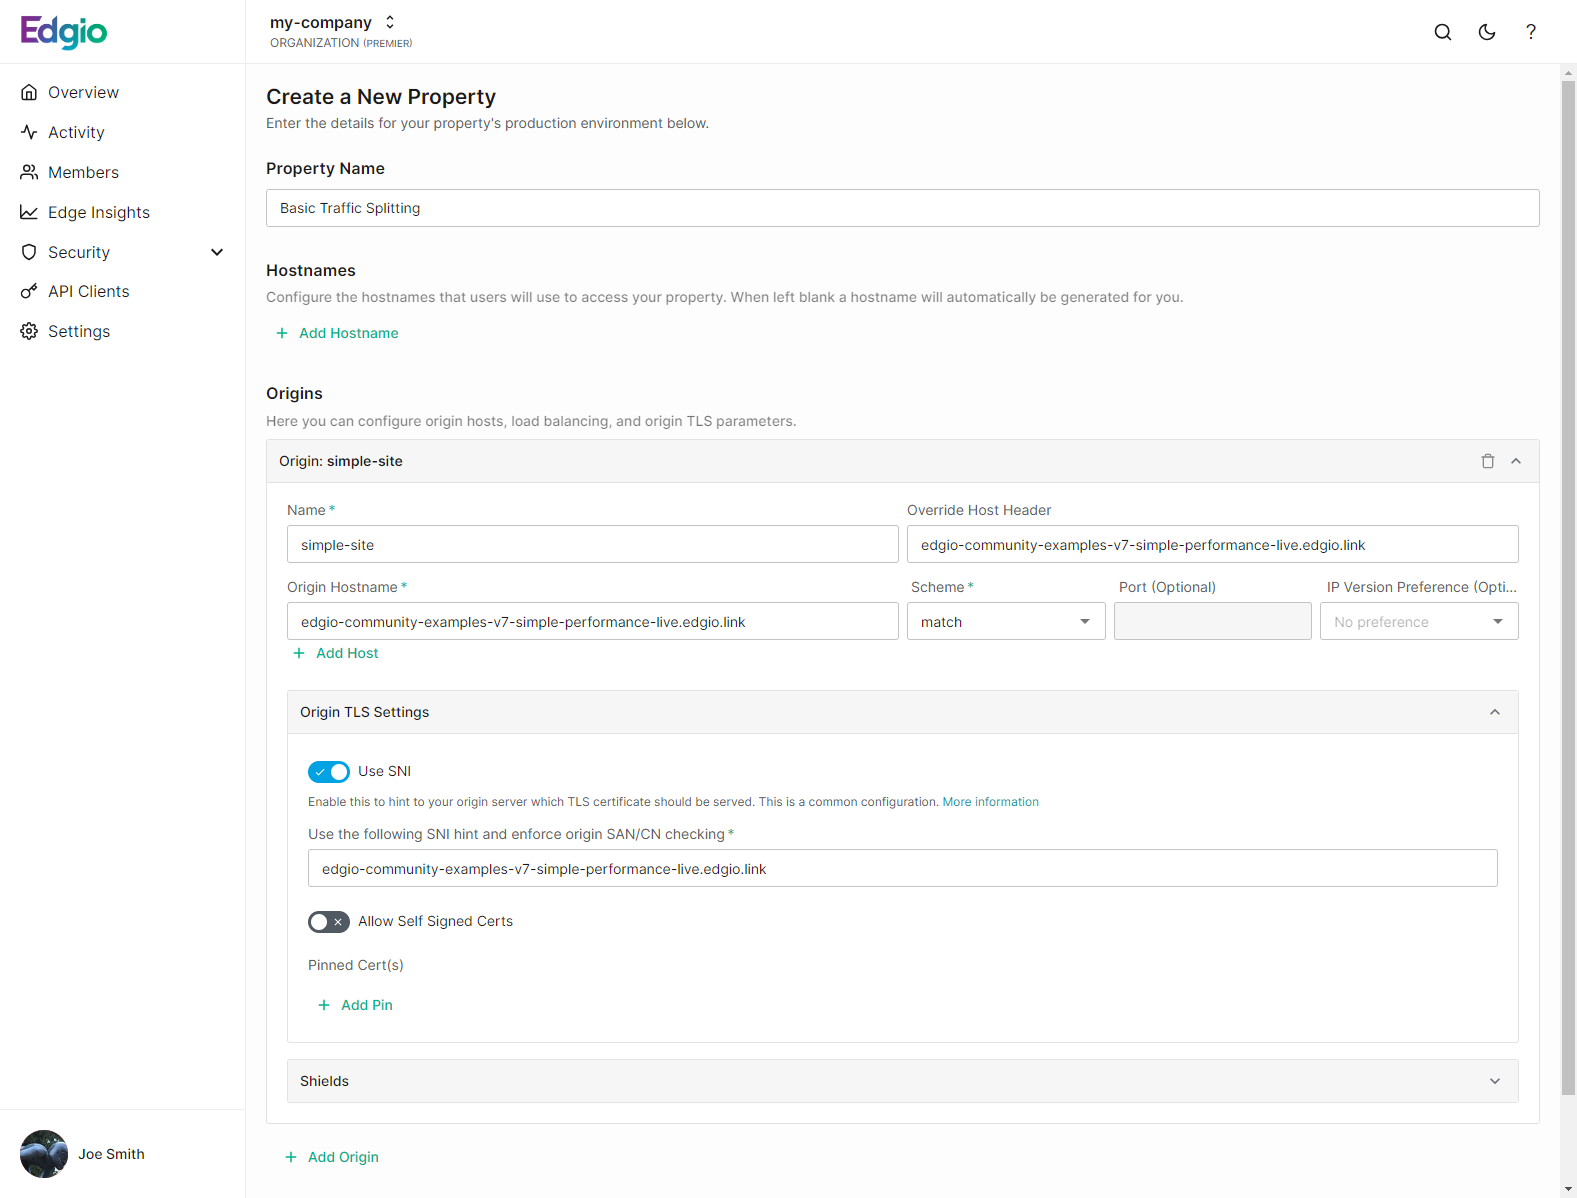
- From the Origins section, set the Name option to
-
Set up an origin configuration for the Full-Featured Performance site.
- Click + Add Origin.
- Set the Name option to
full-featured-site. - Set the Origin Hostname option to
edgio-community-examples-v7-full-featured-perfor-f74158.edgio.link. - Set the Override Host Header option to
edgio-community-examples-v7-full-featured-perfor-f74158.edgio.link.
Your new origin configuration should now look like this: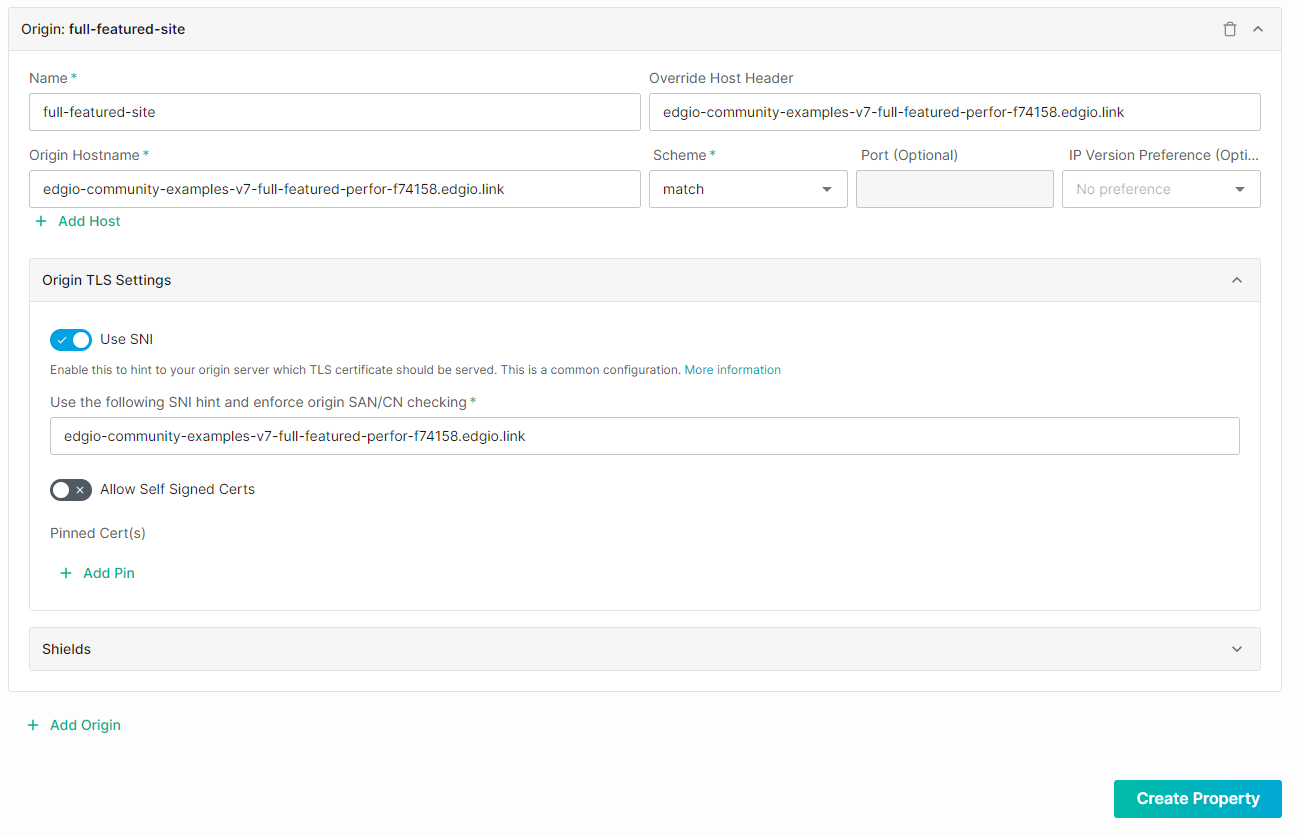
-
Click Create Property. Edgio will now create a property whose Production environment contains two origin configurations that point to our sample Performance websites. After which, it will automatically deploy this configuration.
Create Rules
Create two rules to define the following behavior:
- Set the
x-edg-experimentscookie based off of the value of theexperimentsquery string parameter. - Respond with a custom web page that allows you to select the variant that will be loaded.
-
Navigate to the Rules page.
-
Click + Add Rule to create a rule that sets the
x-edg-experimentscookie. -
Add a Query Parameter match condition for the
experimentquery string parameter.-
Click + Add and then select Add Condition.

-
From the Variable option, select
Query Parameter. -
Set the Parameter Name option to
experiment. -
Set the Operator option to
matches regular expression. -
Set the Match Value option to
\b([1-9]|[1-9][0-9])\b.This values matches whole numbers from 1 to 99. Your configuration should now look like this: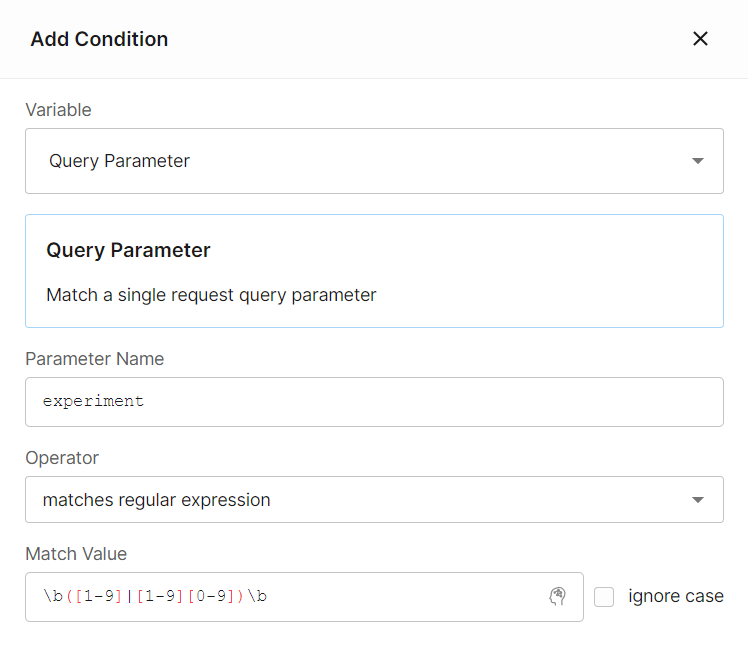
-
Click Add Condition.
-
-
Add an Add Response Headers feature for the
Set-Cookieheader.-
Click + Add and then select Add Feature.
-
Select
Add Response Headers. -
Set the Header Name option to
Set-Cookie. -
Set the Value option to
x-edg-experiments=%{arg_experiment}; Path=/; HttpOnly.Your configuration should now look like this: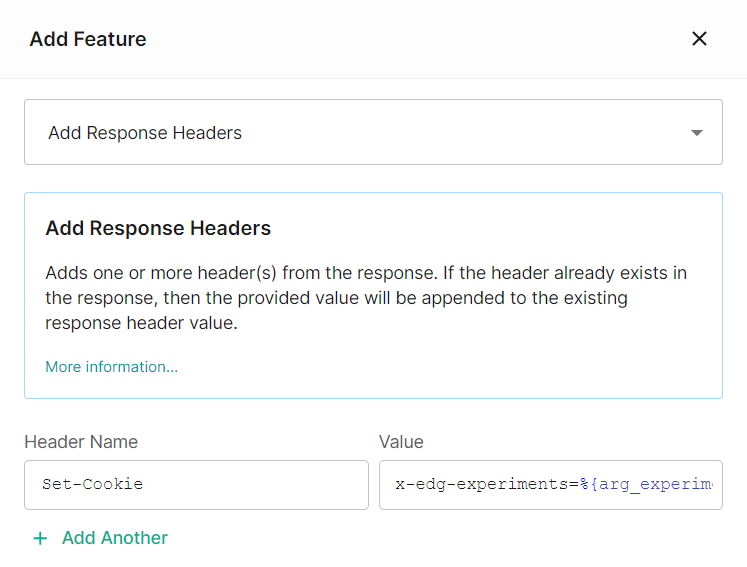
-
Click Add Feature.
Your rule should now look like this: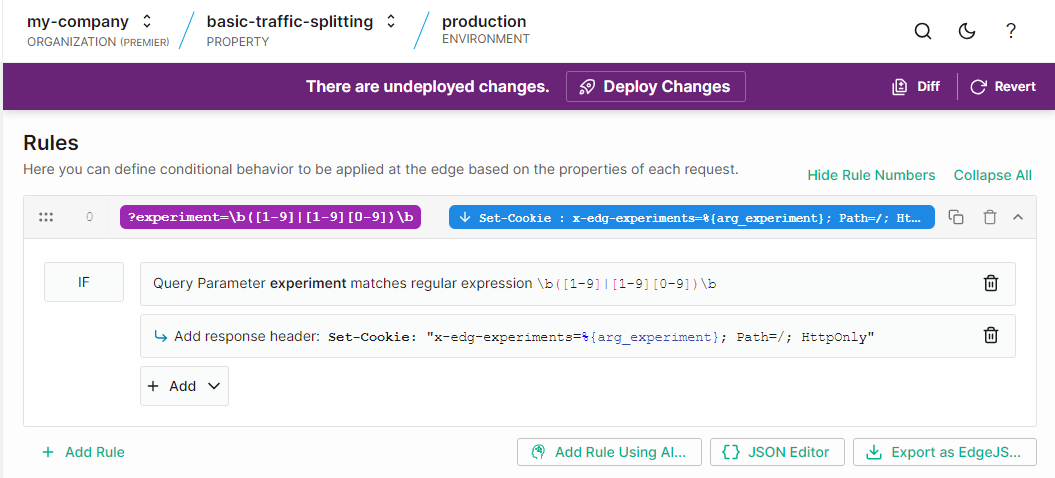
-
-
Click + Add Rule to respond with a custom web page.
-
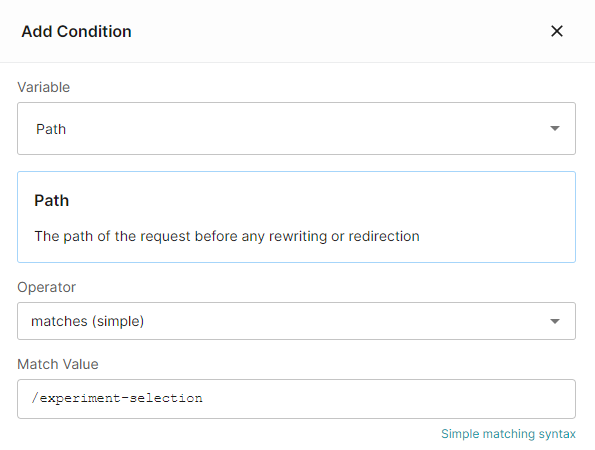
Add a Path match condition for
/experiment-selection. -
Add a Set Response Body feature for the custom web page.
-
Click + Add and then select Add Feature.
-
Select
Set Response Body. -
In the Response Body option, paste the following:HTML1<!DOCTYPE html>2<html lang="en">3<head>4 <meta charset="UTF-8"><meta name="viewport" content="width=device-width, initial-scale=1.0"><title>Experimentation - Variant Selector</title><style>body{font-family:Inter,-apple-system,BlinkMacSystemFont,Segoe UI,Roboto,Helvetica Neue,Ubuntu}h2{font-size:24px;line-height:28px;font-weight:600;margin-top:50px}label,p{font-size:16px;line-height:26px;font-weight:400;overflow:auto}code{font-size:15px;line-height:25px;font-weight:500;text-decoration:none;padding:0 4px;border-radius:4px;background:#f6f9fc;border:1px solid var(--inline-code-border-color);font-variant-ligatures:none;margin:0;text-align:left;box-decoration-break:clone}button{margin-top:15px;padding:8px;border-radius:3px;display:flex;-moz-box-align:center;align-items:center;gap:8px;font-family:"Inter",sans-serif;font-size:14px;font-weight:600;color:#000;background:linear-gradient(90deg,#00bda6 0%,#00a2e2 100%)}.center{margin:auto;width:60%;padding:10px}</style>5</head>6<body>7 <div class="center">8 <h2>Experimentation - Variant Selector</h2>9 <p>The purpose of this page is to demonstrate a sample implementation of Experimentation. This experiment contains the following two variants:10 </p>11 <ul>12 <li><b>Simple Site:</b> This site is loaded when the <code>x-edg-experiments</code> cookie is set to a value from 1 to 89.13 </li>14 <li><b>Full-Featured Site:</b> This site is loaded when the <code>x-edg-experiments</code> cookie is set to a value from 90 to 99.15 </li>16 </ul>1718 <p>19 Choose a variant or set this cookie to a specific value.20 </p>21 <label>22 <input type="radio" name="experimentOption" value="20" checked> Load the Simple site (<code>x-edg-experiments = 20</code>)23 </label><br>24 <label>25 <input type="radio" name="experimentOption" value="90"> Load the Full-Featured site (<code>x-edg-experiments = 90</code>)26 </label><br>27 <label>28 <input type="radio" name="experimentOption" value="custom"> Set the <code>x-edg-experiments</code> cookie to:29 <input type="text" id="customValue" placeholder="1 - 99" maxlength="2" size="2">30 </label><br>31 <button onclick="setExperimentAndLoad()" type="button">Load Variant</button>3233 <h2>How Does It Work?</h2>3435 <p>This page loads a specific variant by setting the <code>x-edg-experiments</code> cookie and then reloading the page.36 </p>37 <p><b>More Information:</b>38 <p>The <code>x-edg-experiments</code> cookie is a HttpOnly cookie. This means that it cannot be set through a client-side script. Rather, it must be set through the Set-Cookie response header. As a result, we set this cookie upon clicking <b>Load Variant</b> and then we reload the page so that the client may submit a request with the updated cookie. Edgio will then respond with the variant that corresponds to that cookie value.39 </p>40 </div>41 <script>42 function setExperimentAndLoad() {43 var selectedOption = document.querySelector('input[name="experimentOption"]:checked').value;44 var customValue = document.getElementById("customValue").value;4546 // Set the experiment query string parameter based on the selected option47 var url = "https://edgio-community-examples-entry.glb.edgio.link/";48 if (selectedOption === "custom" && customValue.trim() !== "") {49 url += "?experiment=" + encodeURIComponent(customValue);50 } else {51 url += "?experiment=" + encodeURIComponent(selectedOption);52 }5354 var win = window.open(url, '_blank');5556 win.addEventListener('load', function() {57 win.location.reload();58 })59 }60 </script>61</body>62</html>
-
Click Add Feature.
-
-
Add a Set Done feature to prevent requests to
/experiment-selectionfrom being proxied to the origin.- Click + Add and then select Add Feature.
- Select
Set Done. - Click Add Feature.
Your rule should now look like this: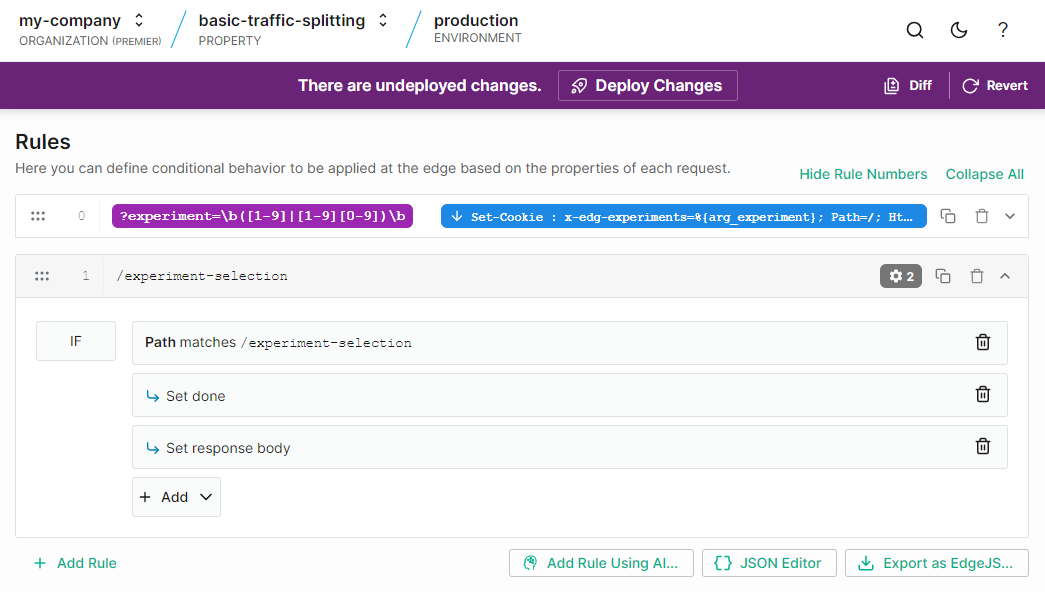
Create Experiment
Set up an experiment that sends 90% of traffic to the Simple site and the remaining 10% of traffic to the Full-Featured site.
-
Navigate to the Experimentation page.
-
Click + Add Experiment.
-
Set the Name option to
Basic Traffic Splitting. -
Add a criteria that excludes requests to
/experiment-selectionfrom this experiment. -
Define a variant that sends 90% of traffic to the Simple site.
-
Define a variant that sends 90% of traffic to the Simple site.
- Set the Name option to
Full Featured Site. - Set the Percentage option to
10. - Click + Add Action.
- Select
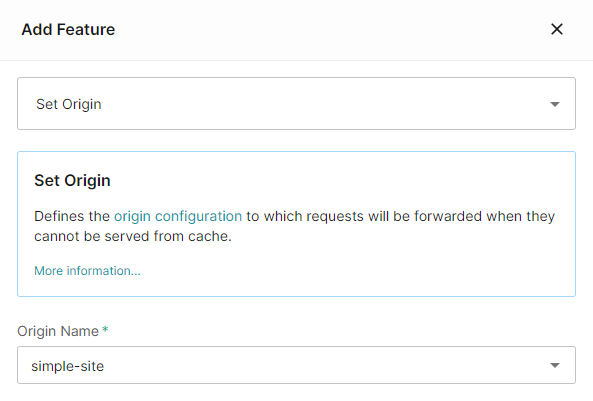
Set Origin. - From the Origin Name option, select
full-featured-site. - Click Add Feature.
- Set the Name option to
-
Click Deploy Changes. When prompted, click Deploy Changes to confirm the deployment.
Experiment
Congratulations on setting up an experiment. You can now test this experiment by either:
-
Loading the site normally. Click on the deployment’s URL.
 The variant assigned to a client persists until cookies are cleared. This means that testing this experiment may require clearing your cookies various times or initiating various distinct private browsing sessions.
 -
Loading the custom web page (Experimentation - Variant Selector) that was defined within your rule. Append
/experiment-selectionto the deployment’s URL.Sample URL:https://edgio-community-examples-entry.glb.edgio.link/experiment-selectionAlthough our sample traffic splitting implementation allows you to seamlessly switch between variants, your implementation will require you to reload the sample site after selecting a new variant.Why? Our website’s security denies page reload requests from a different origin.
