There are two basic approaches to the iterative migration of a website:
- Gradual Roll Out: This approach gradually shifts traffic for a specific change or improvement from the legacy site to the new site. This gradual approach balances risk with efficiency by allowing you to verify functionality as you switch a feature or a page to the new site.
- Gradual Site Buildout: This approach shifts all traffic for a specific change or improvement from the legacy site to the new site. This approach is ideal for small changes, vetted changes, or if you value efficiency over an occassional issue.
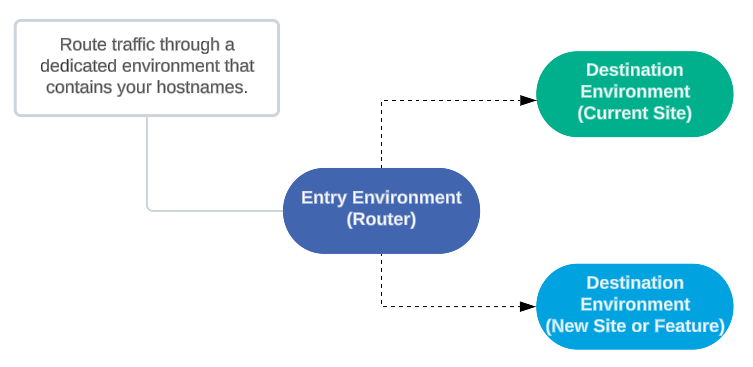
This tutorial demonstrates how to gradually roll out new features when migrating a website. This migration involves the following environments:
- An entry environment through which traffic will be routed.
- A destination environment to which traffic for the current website will be routed.
- A destination environment to which traffic for the new website will be routed.
Quick Start
Migrate a website by performing the following steps:
-
Set up an environment for the current website.
-
Set up an environment for the new website.If you are using Edgio Sites, Cloud Functions, or Edge Functions, then you should set up this environment within a different property’s production environment.
-
Set up an environment that will split traffic between the above environments.
- Remove all rules.
- Create an origin configuration for each environment to which traffic will be split.
- Create an experiment.
-
If you are using Edgio Sites, Cloud Functions, or Edge Functions, then you should set the environment defined in step 1 as the production environment.
-
Test and monitor the experiment.
-
Adjust traffic splitting.
-
Conclude the experiment
Assumptions
This tutorial assumes:
- Your website is already hosted on Edgio.
- You are familiar with the following concepts:
- Edgio Console: If you deploy changes through the Edgio Console, then you should be familiar with the following concepts:
- Properties and environments.
- Setting up origin configurations.
- Deploying through the Edgio Console.
- CDN-as-Code: If you deploy changes through the Edgio CLI, then you should be familiar with the:
- edgio.config.js file
routes.[js|ts]file- Deploying through the Edgio CLI.
- Edgio Console: If you deploy changes through the Edgio Console, then you should be familiar with the following concepts:
Identifying the Entry Environment
This tutorial requires an environment through which traffic for other environments will be routed. We will refer to this environment as the entry environment. We recommend using the environment that contains the hostnames whose traffic will be split.
Reusing an environment that contains your hostnames allows for a seamless transition to traffic splitting and simplifies setup.
If traffic splitting will be performed for a domain that has not been previously registered, then you should perform the following steps:
- Create or identify the entry environment.
- Register the desired hostname(s) within the entry environment.
- Set up TLS for each registered hostname.
Setting Up the Current Website’s Environment
Set up an environment for your current website using either the Edgio Console or the Edgio CLI.
To set up your current website’s environment using the Edgio Console
-
Create an environment.
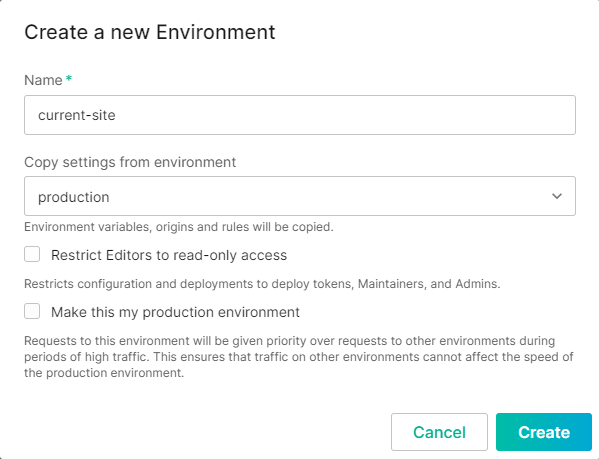
- Navigate to the Environments page and click + New Environment.
- Set the Name option to
current-site. - From the Copy settings from environment option, select your production environment.
- Click Create.
-
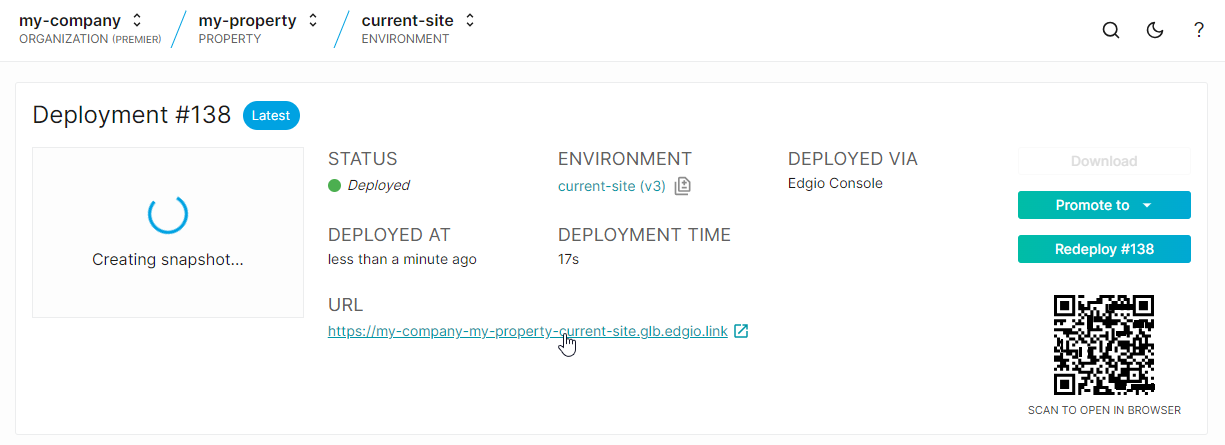
Deploy your changes.
-
Verify your website’s functionality using a URL generated by the deployment.
To set up your current website’s environment using the Edgio CLI
-
Run the following command from your project’s root directory:Bash1edgio deploy --environment current-site
-
Verify your website’s functionality using a URL generated by the deployment.
Setting Up the New Website’s Environment
Set up an environment for your new website using either the Edgio Console or the Edgio CLI.
To set up your current website’s environment using the Edgio Console
-
Create an environment called
new-site.- Navigate to the Environments page and then click + New Environment.
- Set the Name option to
new-site. - From the Copy settings from environment option, select your production environment.
- Click Create.
-
Optional. Adjust your rules to reflect any changes required by your new site.
-
Optional. Adjust your origin configuration(s) to reflect any changes required by your new site.
-
Deploy your changes.
-
Test your new website using a URL generated by the deployment.
To set up your new website’s environment using the Edgio CLI
-
Create a copy of your project.
-
Optional. Place your new project under source control.
-
Optional. From within your
routes.[js|ts]file, adjust your rules to reflect any changes required by your new site. -
Optional. From within your
edgio.config.jsfile, adjust your origin configuration(s) to reflect any changes required by your new site. -
Set up this environment within a different property’s production environment by running the following command from your project’s root directory:Bash1edgio deploy --property migration-second-variant --environment=new-site
-
Set
new-siteas the production environment. -
Verify your website’s functionality using a URL generated by the deployment.
Setting Up the Entry Environment
Set up your entry environment to distribute traffic by performing the following steps:
You may use the following procedure regardless of whether you are using the Edgio CLI to deploy to other environments. However, if you define this environment from within the Edgio Console, you should not deploy to it from the CLI. You may still deploy to other environments using the Edgio CLI.
-
Identify your production environment.
-
Create an origin configuration that points to the
current-siteenvironment.-
Navigate to the
current-siteenvironment’s Deployments page. -
Load the most recent deployment.
-
Copy a domain from the URL section.

-
From the entry environment’s Origins page, create an origin configuration.
- Click + Add Origin.
- Set the Name option to
current-site. - Paste the domain, which was copied in the previous step, within the Override Host Header option.
- Paste the domain, which was copied in the previous step, within the Origin Hostname option.
- If the domain contains
.glb, remove it from both options. - Verify that the Use the following SNI hint and enforce origin SAN/CN checking option was autopopulated with the same domain.
Your origin configuration should should look similar to the following illustration: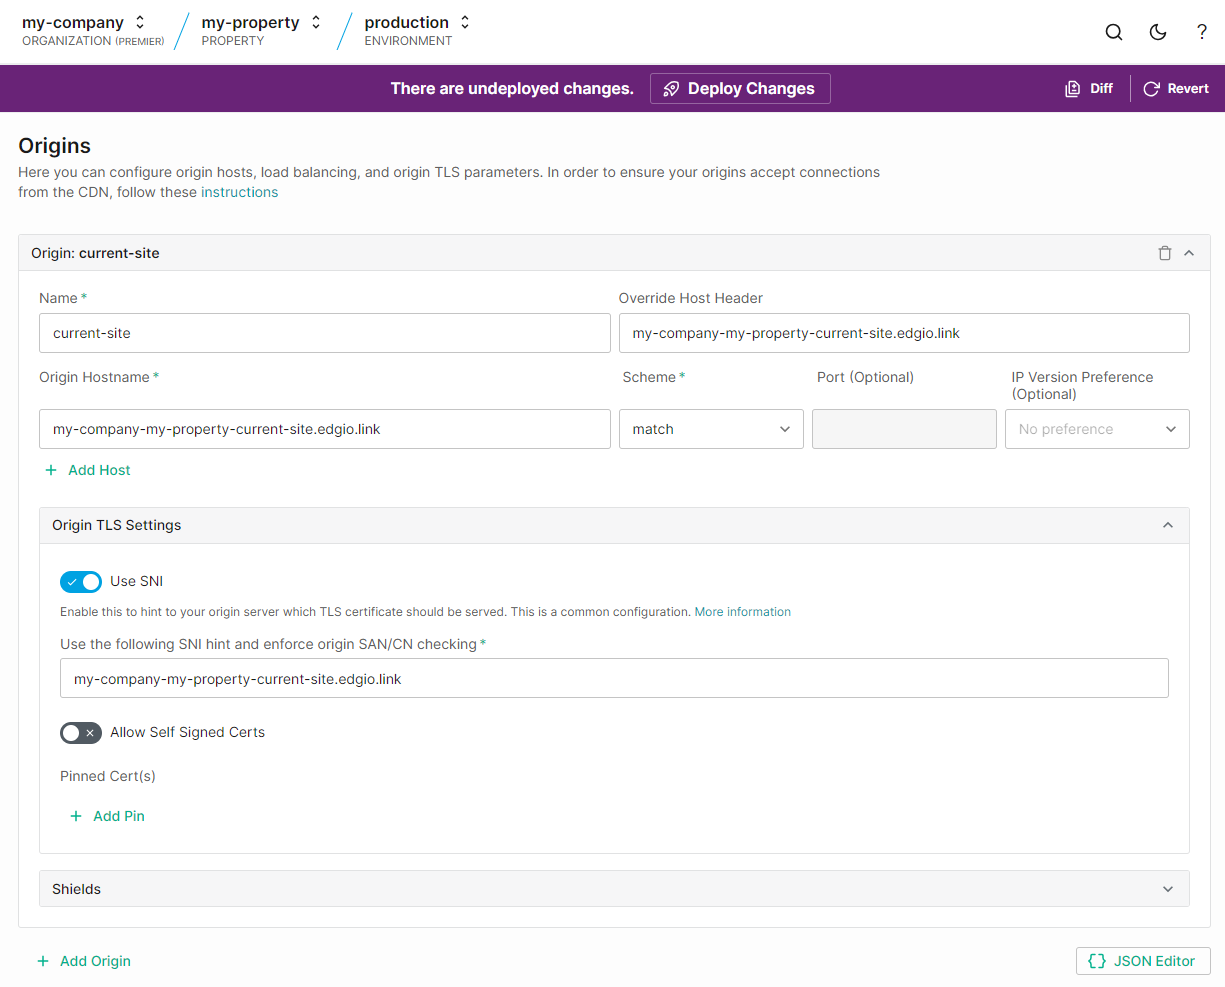
-
-
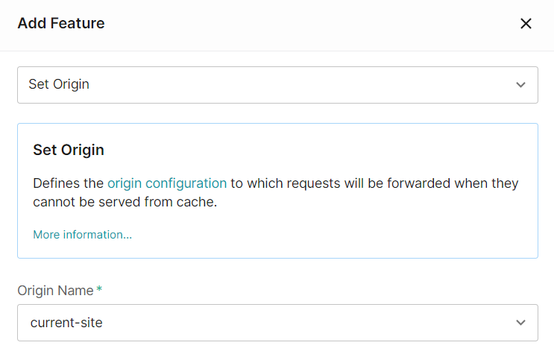
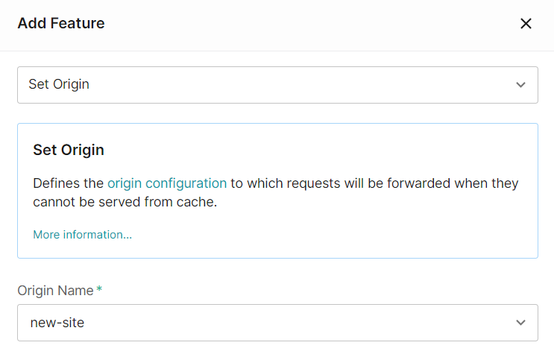
Create an origin configuration called
new-site. Point this origin configuration to thenew-siteenvironment.-
Navigate to the
new-siteenvironment’s Deployments page. -
Load the most recent deployment.
-
Copy a domain from the URL section.
-
From the entry environment’s Origins page, create an origin configuration. Set the
- Click + Add Origin.
- Set the Name option to
new-site. - Paste the domain, which was copied in the previous step, within the Override Host Header option.
- Paste the domain, which was copied in the previous step, within the Origin Hostname option.
- If the domain contains
.glb, remove it from both options. - Verify that the Use the following SNI hint and enforce origin SAN/CN checking option was autopopulated with the same domain.
-
-
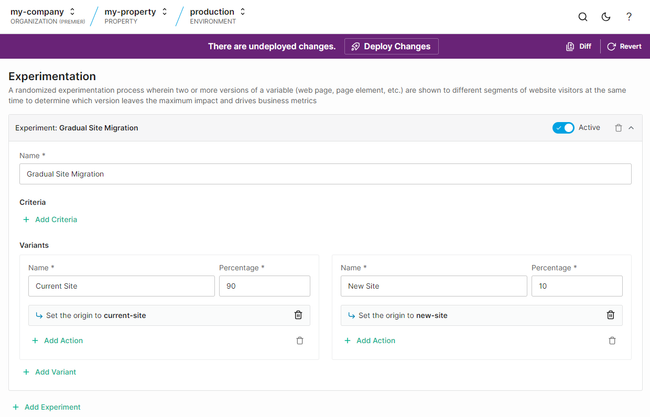
Create an experiment.
-
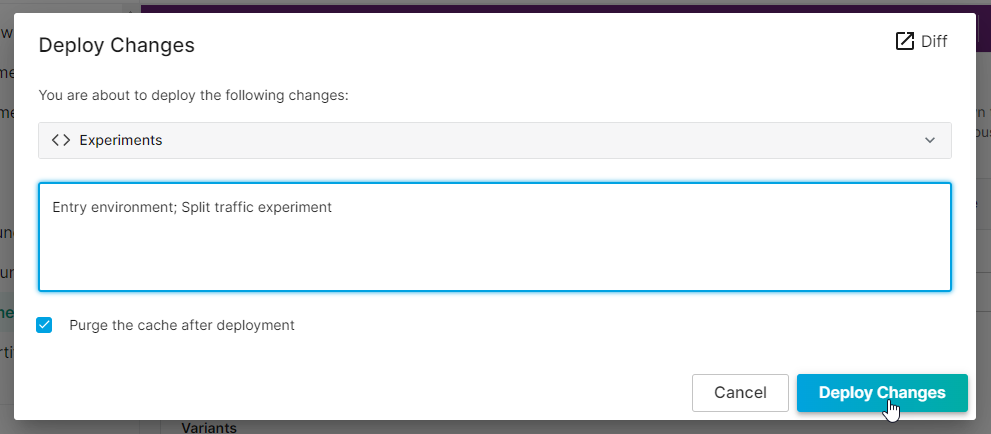
Deploy your changes. Add a label to this deployment to easily identify it in the future.
Production Environment
If you are using Edgio Sites, Cloud Functions, or Edge Functions, then you should set the
current-site environment as the production environment.Testing
Test your traffic splitting configuration by requesting your site as you normally would.
The variant assigned to a client persists until cookies are cleared. This means that testing this experiment may require clearing your cookies various times or initiating various distinct private browsing sessions.
Monitoring
Monitor the traffic for both the current and the new site by using two instances of Edge Insights.
-
Navigate to the
current-siteenvironment. -
Load Edge Insights by clicking Edge Insights from the left-hand pane.
-
Under the Top Results section, set the pie charts to metrics that you would like to compare across both sites.
-
Repeat the above steps for the
new-siteenvironment. -
Compare data across both environments.Synch the time period between both Edge Insights by clicking Now from the left-hand pane of both instances of Edge Insights.
Adjusting Traffic Ratio
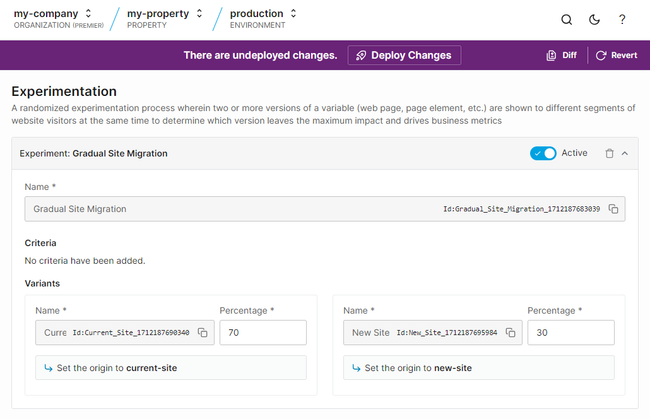
Adjust the traffic ratio between the two variants according to your confidence with the new version of your website. Each traffic ratio adjustment requires a new deployment.
Concluding the Experiment
Conclude the experiment by shifting 100% of your site’s traffic to the
new-site environment.