Get started with Performance by performing these steps:
-
Create a property. If you have already performed this step, proceed to the next step.
-
Create rules that define how Edgio handles your traffic.If you prefer code to UI, then try our CDN-as-code approach to configuration instead.
-
Deploy your updated property to Edgio.
-
Serve production traffic over Edgio by updating your site’s DNS to point to our service.
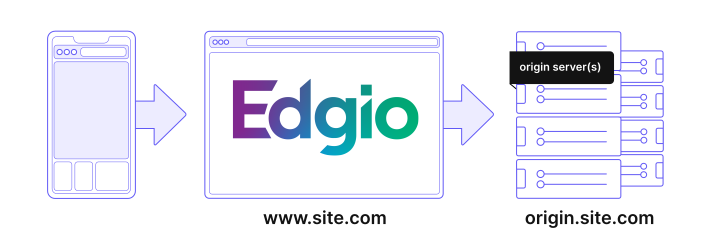
Deploying your web application behind Edgio optimizes the delivery of your site. As illustrated below, requests for your site will pass through Edgio’s globally distributed edge network to your origin server.
Creating Rules
Rules determine how requests to a specific environment will be processed by Edgio.
Rule #1: Default Caching Policy
We will now create a rule that applies a default caching policy to all traffic for the
production environment.-
Load the Rules page.
- From the Edgio Console, select the desired private space or organization.
- Select the desired property.
- From the left-hand pane, select the desired environment from under the Environments section.
- From the left-hand pane, select Rules.

-
Add a rule by clicking + Add Rule.You may add conditions and features to a rule. A condition identifies a set of requests and a feature defines the action that will be applied to them.We will not add a condition to this rule. A rule without a condition applies to all requests.
-
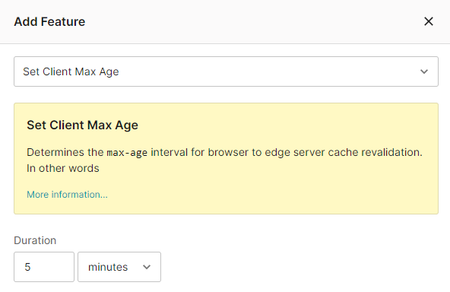
Define a default policy for how long your clients (e.g., web browsers) will cache your content.
-
Define a default policy for how long our CDN will cache your content for
200 OKresponses.-
Click + Add Feature.
-
Select
Set Max Age.You may notice thatSet Client Max Ageis no longer available for selection. This is due to the fact that you may only add a feature a single time per rule. -
Set the duration to 1 day for
200 OKresponses.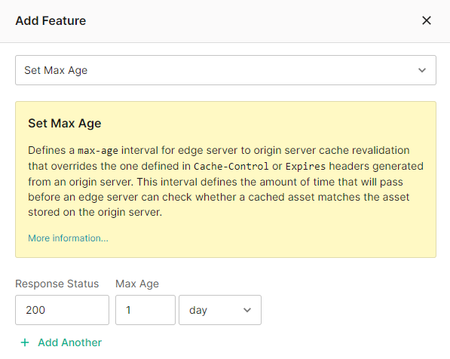
-
Click Add Feature.Your rule should now look similar to this:

-
Rule #2: Path-Specific Caching Policy
We will now create a rule that applies a different caching policy for requests whose relative path starts with
/news/. In order to allow this rule to override your default caching policy, it needs to be positioned below your initial rule.-
Add a rule by clicking + Add Rule.
-
Define the type of requests to which this rule will be applied.
-
Click +Add Condition.
-
Select
Path. -
Leave the Operator option to
matches (simple). -
Match for requests whose relative path starts with
/news/by setting the Match Value option to:/news/:path*Thematches (simple)operator supports named parameters. A named parameter (e.g.,:path) represents a URL segment. Appending a*matches everything that follows that URL segment.Your condition should now look like this: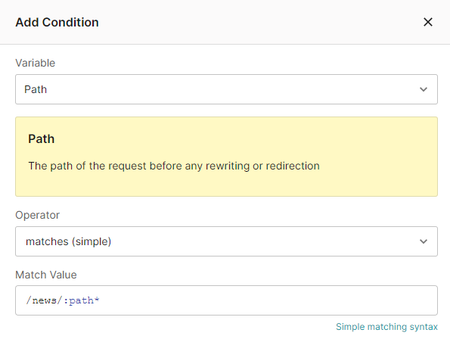
-
Click Add Condition.
-
-
Define how long our CDN will cache content for
200 OKresponses to the requests identified in the previous step.
Deploying Your Property
Evaluate site performance and QA functionality by deploying your property to Edgio.
-
Click Deploy Changes from any page within the
productionenvironment.
-
When prompted, provide a brief description for this change and then click Deploy Changes.Example:
Setting a default caching policy and a caching policy for /news/ requests. -
From the left-hand pane, select Deployments.
-
View the deployment by clicking on the version number (e.g.,
#2) for the latest deployment.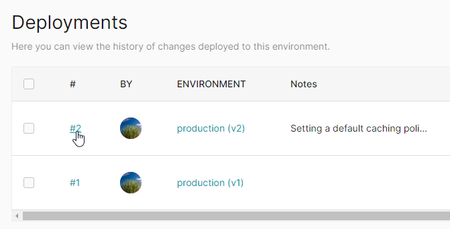
-
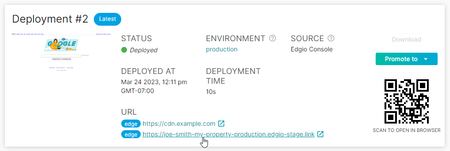
Preview your site by clicking the second edge link displayed under the URL section.
Congratulations on deploying a caching policy to Edgio!
You are now ready to:
-
Assess performance and caching behavior through Edge Insights and Core Web Vitals.
-
Fine-tune your configuration by adding rules and then redeploying your property.
-
Once you are ready to serve production traffic through Edgio, update your site’s DNS to point to our service.
