

Upgrading from Edgio Applications version 6 or earlier may require significant changes to your CDN-as-code configuration as certain core legacy components have limited support. View our upgrading guide.
Edgio provides a CDN-as-code platform that allows you to configure CDN behavior using EdgeJS within a file (
routes.[js|ts]) stored alongside your code. This allows you to leverage the power of source control for collaboration and to link your CDN configurations with specific versions of your web application.Quick Start
Get started with CDN-as-code by either experimenting with:
-
Our sample websites:
-
Your web application or website.
Create a Property
Create a property. If you have already performed this step, proceed to the next step. Learn more.
Initialize Your Property
Use the Edgio CLI to initialize your property. If you have already performed this step, proceed to the next step.
This step requires Node.js v18.x.
Install the Edgio CLI, initialize your property, and then deploy it by running the following command from the root directory of your web application or website:
Bash
1npx @edgio/cli@latest init \2 --edgioVersion latest \3 --name <PROPERTY> \4 --deploy
Replace
<PROPERTY> with the name of the property defined in step 1. You should only use lower-case characters and replace spaces with dashes (e.g., my-property).When you run the above command, the CLI will prompt you with the following questions to set up your property:
text
1🚀 Let's get started with Edgio!23 ✔ What is the hostname or IP address of the origin site that you will host on Edgio? … my-custom-property.com4 ✔ Should we create a new directory for your Edgio app or use the current directory? › Create a new directory5 ✔ Which package manager would you like to use? › npm6 ✔ installing @edgio/core, @edgio/cli, @edgio/prefetch, @edgio/devtools... done.7 > edgio.config.js not found, creating...8 > routes.js not found, creating...9 🔑 You are not logged in.1011 ? To log you in we're going to open your browser and visit Edgio Developer Console. › - Use arrow-keys. Return to submit.12 ❯ Continue13 Cancel
First, you will be prompted to enter the hostname or IP address of the origin site that you will host on Edgio. This is the site that Edgio will fetch content from. For example, if you are using Edgio to improve the performance of
my-custom-property.com, then you would enter my-custom-property.com here.Next, you will be prompted to choose whether to create a new directory for your Edgio property or use the current directory. If you are currently in the root directory of your project code, then choose
Use the current directory.Finally, you will be prompted to choose which package manager to use, either
npm or yarn.If this is your first time using the Edgio CLI to deploy, then you will be prompted to log in to the Edgio Console. To log in, select
Continue. This will open a browser window where you may log in by creating a new account, or authenticating with a third-party provider such as Google or GitHub. Once you log in, you’ll be prompted to authorize creating a local access token: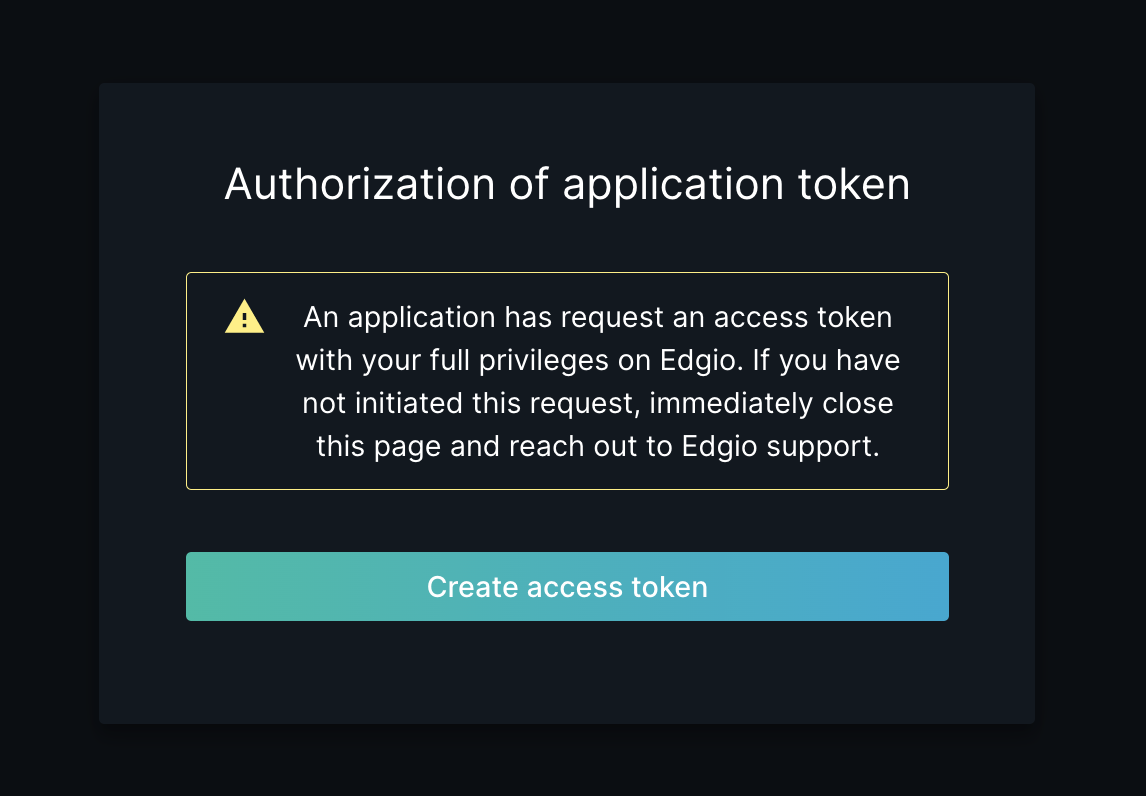
After clicking Create access token, you may return back to the CLI and continue with the deployment.
Although authentication is unnecessary for local builds and previews, we
strongly recommend that you authenticate now to avoid the failure of your
first deployment.
Once your deployment completes, you should see an output similar to the following:
text
1🚀 Let's get started with Edgio!23 ✔ What is the hostname or IP address of the origin site that you will host on Edgio? … my-custom-property.com4 ✔ Should we create a new directory for your Edgio app or use the current directory? › Create a new directory5 ✔ Which package manager would you like to use? › npm6 ✔ installing @edgio/core, @edgio/cli, @edgio/prefetch, @edgio/devtools... done.7 > edgio.config.js not found, creating...8 > routes.js not found, creating...9 🔑 You are not logged in.1011 ✔ To log you in we're going to open your browser and visit Edgio Developer Console. › Continue12 Authenticating user!13 Please visit this URL from any device and click on "Create access token" to authorize this device:14 https://api.edgio.app/account/cli?name=CLI+Api+Key&sid=<ID>&action=deploy1516 Waiting for authentication...17 🔑 You are now logged in as "xxx@yyy.zzz"1819 📋 Deploying to:20 > Team: Private space21 > Site: my-custom-property.com22 > Environment: default23 > Edgio version: 7.0.1224 > Deployment #12526 🛠️ Building your app for deployment on Edgio27 > Bundling router... done.28 > Bundling edge functions... done.29 > Writing static asset aliases... done.30 done 277ms3132 📦 Packaging...33 > Zipping project folder34 > Size: 674.22 KB35 done 177ms3637 📡️ Uploading...38 done 1s3940 ⌛ Deploying...41 done 56s4243 ***** Deployment Complete *****************************************************44 * *45 * 🖥 Edgio Developer Console: *46 * https://edgio.app/<YOUR-ORGANIZATION>/my-custom-property.com/env/default/builds/1 *47 * *48 * 🔗 Permalink: *49 * https://<YOUR-ORGANIZATION>-my-custom-property-com-1.free.edgio-perma.link *50 * *51 * 🌎 Edge: *52 * https://<YOUR-ORGANIZATION>-my-custom-property-com-default.edgio.link *53 * *54 *******************************************************************************5556 To change directories to your new Edgio app:5758 cd my-custom-property.com5960 To run your app locally:6162 edg dev6364 To redeploy your app:6566 edg deploy
Edgio Files
During the initialization process, the Edgio CLI created the following files:
edgio.config.js: This file contains the configuration for your Edgio property. You can use this file to configure your property’s name, environments, origins, and other settings. Learn more.routes.[js|ts]: This file contains the router rules for your Edgio property. You can use this file to define how Edgio will handle requests to your property.
Config File
The
edgio.config.js file contains some configurations the router may reference for handling requests along with other components such as connectors.The default
edgio.config.js file contains the following configuration based on the input from out initialization process:JavaScript
1// This file was automatically added by edgio init.2// You should commit this file to source control.3// Learn more about this file at https://docs.edg.io/applications/edgio_config4module.exports = {5 // The name of the property in Edgio to which this app should be deployed.6 name: 'my-custom-property.com',78 // The name of the organization in Edgio to which this app should be deployed.9 // team: 'my-organization-name',1011 // Overrides the default path to the routes file. The path should be relative to the root of your app.12 // routes: 'routes.js',1314 origins: [15 {16 // The name of the backend origin17 name: 'web',1819 // Uncomment the following to override the host header sent from the browser when connecting to the origin20 // override_host_header: 'example.com',2122 // The list of origin hosts to which to connect23 hosts: [24 {25 // The domain name or IP address of the origin server26 location: 'my-custom-property.com',27 },28 ],2930 // Uncomment the following to configure a shield31 // shields: { us_east: 'DCD' },32 },33 ],3435 // Options for hosting Cloud Functions on Edgio36 // serverless: {37 // // Set to true to include all packages listed in the dependencies property of package.json when deploying to Edgio.38 // // This option generally isn't needed as Edgio automatically includes all modules imported by your code in the bundle that39 // // is uploaded during deployment40 // includeNodeModules: true,41 //42 // // Include additional paths that are dynamically loaded by your app at runtime here when building the bundle.43 // include: ['views/**/*'],44 // },4546 // The maximum number of URLs that will be concurrently prerendered during deployment when static prerendering is enabled.47 // Defaults to 200, which is the maximum allowed value.48 // prerenderConcurrency: 200,4950 // A list of glob patterns identifying which source files should be uploaded when running edgio deploy --includeSources.51 // This option is primarily used to share source code with Edgio support personnel for the purpose of debugging. If omitted,52 // edgio deploy --includeSources will result in all files which are not gitignored being uploaded to Edgio.53 //54 // sources : [55 // '**/*', // include all files56 // '!(**/secrets/**/*)', // except everything in the secrets directory57 // ],58};
The relevant configuration options generated include the
name and origins properties that will be used later.- The
nameproperty is used to identify your Edgio property in the Edgio Console - The
originsproperty is used to configure the origins to which the router will connect when handling requests.
Defining Origins
In the
edgio.config.js, the origins property allows you to define one or more origins that Edgio will use to communicate with your web servers.The configuration above shows a single origin named
web that connects to my-custom-property.com as defined by the hosts property.JavaScript
1origins: [2 {3 // The name of the backend origin4 // Proxy requests to this origin by referencing this name within your router5 name: 'web',67 // Uncomment the following to override the host header sent from the browser when connecting to the origin8 // override_host_header: 'example.com',910 // The list of origin hosts to which to connect11 hosts: [12 {13 // The domain name or IP address of the origin server14 location: 'my-custom-property.com',15 },16 ],1718 // Uncomment the following to configure a shield19 // shields: { us_east: 'DCD' },20 },21];
The origin name set here will be referenced later when configuring the router to proxy requests.
Learn more about the
edgio.config.js file and all the configuration options it supports.Routes File
The
@edgio/core package provides a JavaScript API for controlling routing and caching from your code base rather than a CDN web portal. Using this EdgeJS approach allows this vital routing logic to be properly tested, reviewed, and version controlled, just like the rest of your application code.Using the router, you can:
- Proxy requests to upstream sites
- Send redirects from the network edge
- Render responses on the server using Next.js and Nuxt.js, or any other framework that supports server side rendering.
- Alter request and response headers
- Send synthetic responses
As mentioned above, the
routes.[js|ts] file is created during the initialization process.By default, our CLI automatically creates
routes.js and edgio.config.js upon initializing a property (edgio init). If your web application supports TypeScript and it uses a framework for which we have a TypeScript implementation, then our CLI will create routes.ts instead of routes.js.The routes file contains Rules that:
- Identifies requests by HTTP method, URL path, query string parameters, cookies, and request headers.
- Determines how our CDN will handle the above requests. For example, you may configure those requests to be cached, prefetched, passed through without modification, served as static content, and more.
Default Route Configuration
By default, your
routes.[js|ts] contains the following configuration:JavaScript
1// This file was added by edgio init.2// You should commit this file to source control.3import {Router, edgioRoutes} from '@edgio/core';45export default new Router()6 // Here is an example where we cache api/* at the edge but prevent caching in the browser7 // .match('/api/:path*', {8 // caching: {9 // max_age: '1d',10 // stale_while_revalidate: '1h',11 // bypass_client_cache: true,12 // service_worker_max_age: '1d',13 // },14 // })1516 // plugin enabling basic Edgio functionality17 .use(edgioRoutes);
The above route matches all requests that start with
/api/ and instructs Edgio to:- Cache those requests on our network for one day.
- Allow us to serve stale content for one hour.
- Instruct the browser to treat the response as immediately stale.
- Allow prefetched requests to be served from cache for one day.
- Proxy those requests to your
webbackend when we cannot serve them from cache.
Routes
A route identifies a set of requests through any combination of URL path, HTTP method, cookies, request headers, query string parameters and more (see Conditions). The following routes show various ways for identifying requests.
Parts of a Route
Routes define a set of Rules that determine how requests will be handed by Edgio.
In EdgeJS, this is broken down into two parts when calling a router function. We’ll dive deeper into the different available methods below, but for now, will use the
.match() method as an example.The
.match() takes two arguments: .match(criteria, features). The .match() API documentation will provide you with the specific type definitions, but we’ll refer to them as criteria and features throughout this guide.criteriacan be a String for a simple path matching, or an Object that defines more specific criteria for matching requests such as HTTP method, headers, cookies, and query string parameters.featuresis an Object that defines how Edgio will handle the requests that match the criteria, such as caching, redirects, proxying to an origin server, and more.
Route Criteria
Below are some simple examples of how to match requests using the
.match() method.-
Match all requests:JavaScript1router.match('/:path*', {2 // features3});
-
Match all
GETrequests whose URL path starts with/marketing/images/:JavaScript1router.get('/marketing/images/:path*', {2 // features3}); -
Match all
GETandPOSTrequests whose URL path starts with/marketing/images/and contain thesportrequest header set tobasketball:JavaScript1router.match(2 {3 path: '/marketing/images/:path*',4 method: /GET|POST/i, // regular expression5 headers: {sport: /^basketball$/i}, // keys are header names; values are regular expressions6 },7 {8 // features9 }10);
Learn more advanced syntax with Route Criteria and Conditions.
Route Features
Once you have identified a set of requests, you need to define how Edgio will handle those requests. The following routes show various ways in which requests can be processed.
- Apply a caching policy to all requests and proxy cache misses to the
webbackend:
JavaScript
1router.match('/:path*', {2 {3 caching: {4 max_age: "1h"5 },6 origin: {7 set_origin: "web"8 }9 }10 })
- Set the
imagesresponse header and proxy cache misses to thewebbackend for allGETrequests whose URL path starts with/marketing/images/:
JavaScript
1router.get('/marketing/images/:path*', {2 headers: {3 set_response_headers: {4 images: 'true',5 },6 },7 origin: {8 set_origin: 'web',9 },10});
- Redirect a URL to its new location:
JavaScript
1router.get('/old/path', {2 url: {3 url_redirect: {4 code: 301,5 source: '\\/old\\/path',6 destination: '/new/path',7 },8 },9});
Learn more advanced syntax with Route Features.
Defining Routes
Routes are defined by calling a method on the
Router class. While most methods correspond to HTTP methods, others allow for more flexible request matching.General Matching Methods:
always(matches all requests; requires Edgio v7.2.0 or later)match(matches on criteria including path, method, headers, cookies, and query string parameters)
Standard HTTP Methods:
getpostputdeletepatchoptionshead
For a complete list and details, refer to the Router API documentation.
Route Execution
When Edgio receives a request, it executes each route that matches the request in the order in which they are declared.
Multiple routes can therefore be executed for a given request. A common pattern is to render the response with middleware such as
nextRoutes while adding caching for a route that may also be handled by the middleware. In the following example we render a response with Next.js and cache it at the edge for 1 hour:JavaScript
1import {Router} from '@edgio/core';2import {nextRoutes} from '@edgio/next';34export default new Router()5 // Send requests to the Edgio cloud and render the response with Next.js6 .use(nextRoutes)78 // Cache all requests to /products/:id for 1 hour9 .get('/products/:id', {10 caching: {max_age: {200: '1h'}, stale_while_revalidate: '1h'},11 });
Testing Locally
You may run Edgio in local development mode to preview your website on your local machine prior to deployment. Local development mode allows for rapid development by letting you to quickly test changes prior to deployment.
- From the command line or terminal, type
edgio dev. - Preview your website by loading
https://127.0.0.1:3000from within your preferred web browser.
Deploying Your Property
Evaluate site performance and QA functionality by deploying your property to Edgio. Run the following command from your property’s root directory:
Bash
1edgio deploy
Your initial CDN-as-code deployment will generate system-defined origin configurations along with those defined within your
edgio.config.js. Learn more about system-defined origins.Assess performance and caching behavior from the Edgio Console. Fine-tune your configuration by adding routes and then redeploying your property. Once you are ready to serve production traffic through Edgio, update your site’s DNS to point to our service.
Environments
An environment is automatically created when you deploy your property for the first time. The initial environment that is created will differ based on how your property was created.
If you first create your property using the Edgio Console, the first environment will be named
production and will serve as the production environment for your property. If you first deploy your property using the CLI, the first environment will be named default and will serve as the production environment for your property.The first time you deploy your property from the CLI, Edgio will create a
default environment which will serve as the production environment for your property. You can create additional environments to test changes before deploying them to production.Creating a New Environment
To create a new environment, deploy your property with the
-e, --environment flag followed by the name of the new environment. For example, to create a new environment named staging, run the following command:Bash
1edgio deploy --environment staging
Create additional environments to match your software development workflow.
You may also manage environments from the Edgio Console. Learn
more.
Setting the Production Environment
By default, the first environment created for your property will be tagged as “production”. This means that the performance of this environment will be prioritized over other environments during periods of high traffic. Examples of high traffic periods are a distributed denial of service (DDOS) attack or a load test.
Designating an environment as the production environment must be managed from the Edgio Console. See Production Environment for more information.
Deploying to a Specific Environment
To deploy to a specific environment, use the
-e, --environment <NAME> flag where <NAME> is the name of the target deployment environment. For example, to deploy to the production environment, run the following command:Bash
1edgio deploy --environment production
Configuring Environments
The
edgio.config.js file contains an environments property that allows you to configure your environments, including options like hostnames and origin overrides on a per-environment basis. Learn more.Examples
Use our sample website to gain hands-on experience on how to set up Edgio Performance. Specifically, you can browse our sample websites, view their source code, and even experiment on them by deploying them to Edgio.
Simple Example
This example demonstrates a basic Edgio configuration for
publicdomainreview.org. It contains two routes that cache content according to their file extension.Full-Featured Example
This example demonstrates a full-featured Edgio configuration that showcases the following functionality:
-
Increasing the cache buffer during revalidation through StaleWhileRevalidate
-
Prefetching and Deepfetching cached content to improve performance.Prefetching only improves performance for cached content. Edgio returns
412 Precondition Failedwhen prefetching a cache miss. This status code means that the prefetching did not occur for that request. -
Transforming the response through Cloud Functions
-
Generating performance insights through DevTools
-
Tracking Core Web Vitals through real user monitoring (RUM).
Issues?
If you have any issues during this process, check our forums for assistance.