This guide shows you how to create production, staging, and other environments.
Overview
In order to serve your site on a specific domain, you need to configure an environment. Most sites have at least three environments: default, staging, and production. Free accounts are limited to three environments. Paid accounts allow you to create either five environments (on the Hyper plan) or as many environments as you need (on Enterprise plans). Each environment consists of:
- Domains - one or more domains on which the site will be served. Domains cannot be set on the default environment. The domain name for the default environment is derived from your team and site’s name.
- Environment Variables - secrets and other values that are specific to the environment and are not appropriate to check into source control. For example, API keys are commonly stored as environment variables.
- Split Testing - Split traffic between multiple router destinations or other environments to conduct A/B testing or implement blue/green deployments.
- Caching - Each environment has a separate cache space that is automatically cleared each time you deploy. Use the Caching tab to clear the cache by path or surrogate key.
Creating an Environment
To create an environment, navigate to your site, select the Environments tab, and click New Environment:

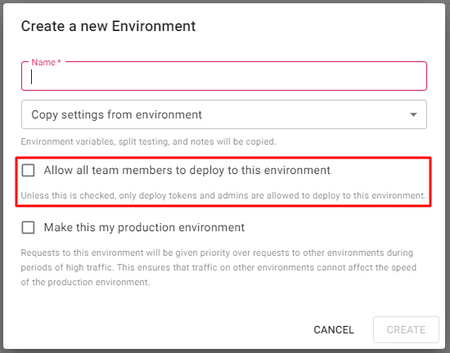
When creating an environment, you can choose whether or not to limit deployment capabilities to admins and deploy tokens, or to make it available to all members of the team:

Deploying to an Environment
To deploy to an environment, you can
0 deploy with the --environment option:Bash
10 deploy <team name> --environment=<environment name>
You can also promote any existing deployment to an environment using the PROMOTE TO ENVIRONMENT button at the top of the deployment view:

When configuring CI, we recommend:
- Automatically deploying to your staging environment when a PR is merged to the master branch of your repo.
- Manually promoting deployments to production using the Edgio Console to prevent unwanted builds from being published by misconfigured CI workflows.
Production Environment
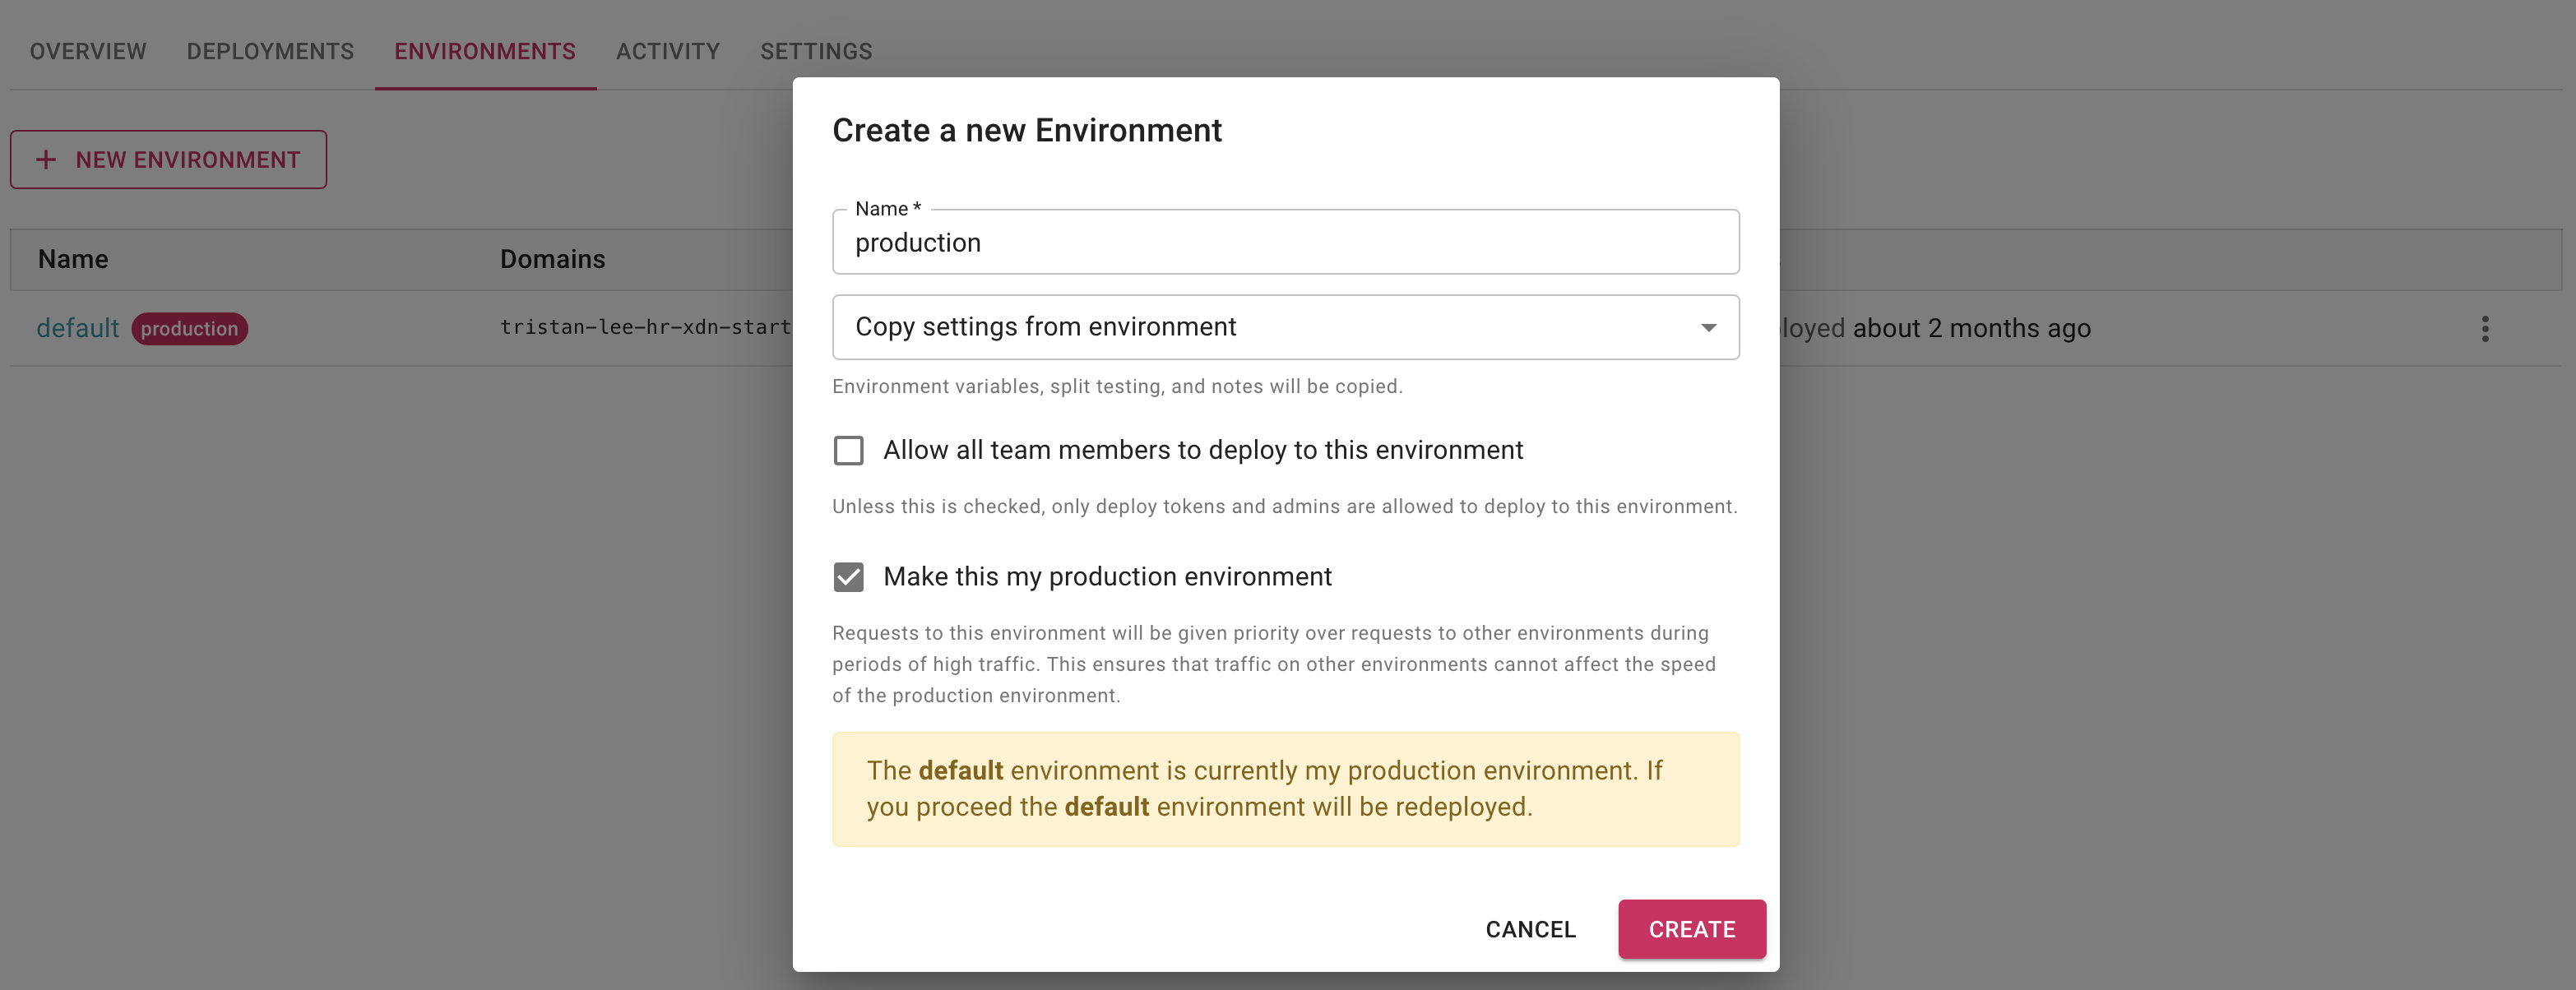
To ensure that your production environment gets priority over all other environments during periods of high traffic, mark it as production by selecting this option during creation:

Or from the environments list in the site view:

Failure to do so could cause your production environment to become slow if another environment experiences an unexpected surge in traffic, for example due to an attack or load test.
Environment Versions
Since environments contain important settings that affect how your site functions, they are versioned. This makes it easy to roll back to a previous version of the environment if you make a change that breaks the site. To change your environment settings, create a new draft version by clicking the Edit button:

As you make changes they are saved in the draft version. Once you’re ready to deploy your changes, click Activate.

Doing so will redeploy the environment’s active deployment, but updated with the new environment configuration.
Environment Variables
You can create environment variables on a Edgio environment basis. Environment variables allow you to control certain facets of your application outside of its code. Edgio environment variable types are:
- User-defined - see Creating and Editing Environment Variables
- Built-in - see Built-in Environment Variables
Creating and Editing Environment Variables
- Navigate to your site and select the ENVIRONMENTS tab:

- In the resulting list of deployments, click the desired version under the ENVIRONMENT list header.

The environment’s current settings are listed and environment variables are displayed in the resulting CONFIGURATION tab:

To add or edit environment variables, you must create a new environment version (see Environment Versions).
-
Click the EDIT button at the top right of the screen and scroll to the Environment Variables section.
-
Create a Variable
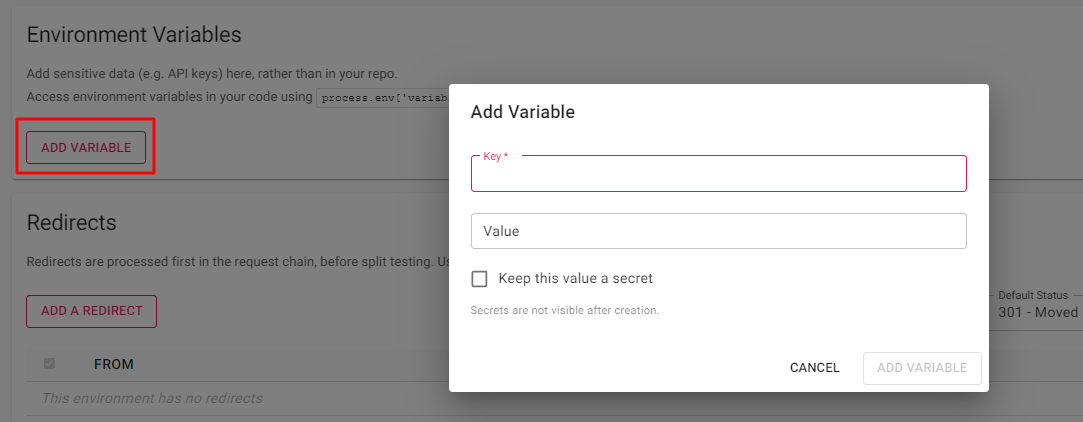
- Click the the ADD VARIABLE button.

-
Enter the variable name (key) and value in the Add Variable dialog. If you wish to hide the value after creation, click the Keep this value a secret field.
-
Click the ADD VARIABLE button in the dialog.
-
Edit a Variable
-
Click the variable’s row.
-
The resulting dialog is similar to the Add Variable dialog. Modify the variable name and value and click the Keep this value a secret field if needed.
-
Click the ADD VARIABLE button in the dialog.
-
-
Each variable you add or edit is listed in a table and can be deleted by clicking the delete icon.

- Click the ACTIVATE button at the top right of the screen to save the new version.
You are returned to the new version’s CONFIGURATION tab and all variables are listed in the Environment Variables section. Secret values are masked with asterisks.

Built-in Environment Variables
Edgio automatically injects the following environment variables:
NODE_ENV: Set toproductionby default, but you can override this through the console.LAYER0_ENVIRONMENT_NAME: The name of the environment (e.g.default,productionand so on). This cannot be overridden by you.
Accessing Environment Variables
At Build Time
When you deploy to an environment using a deploy token, for example by running
0 deploy my-team --environment=production --token=(my token) option, all environment variables are pulled down from the Edgio Developer Console and applied to process.env so they can be accessed at build time. This allows you to store all of your build and runtime secrets in a single place, the Edgio Developer Console, rather than storing some in your CI system’s secret manager.At Run Time
The variables you configure on an environment can be accessed in your code using
process.env. A common use case is to configure
different backend host names in layer0.config.js based on the environment. Here is an example where the origin backend is determined
by a HOST environment variable.JavaScript
1// layer0.config.js2const defaultHostname = 'origin.my-site.com'34module.exports = {5 backends: {6 origin: {7 domainOrIp: process.env.HOST || defaultHostname, // Falling back to defaultHostname is needed during the initial8 hostHeader: process.env.HOST || defaultHostname, // deployment of your site, when an environment is not yet configured.9 },10 },11}
Note that your
layer0.config.js file is loaded during deployment to configure the edge for your environment. The first time you
deploy your site, there won’t be any environment variables defined, so you need to include defaults in layer0.config.js as
shown in the example above.dotenv
To configure secrets during local development, we recommend using dotenv.
If you would like to reference environment variables read from
.env in layer0.config.js, add the following at the top
of layer0.config.js:JavaScript
1// layer0.config.js2require('dotenv').config()